Follow this steps:
- Download the plugin.
- Open WordPress admin, go to Plugins, click Add New. Then upload Plugin
- Click select file button and upload the .zip file.
- Activate & open plugin’s settings page located in the main WP admin menu as “Auy Autochat”
Or if needed, upload manually:
- Download the plugin.
- Unzip it and upload to /wp-content/plugins/
- Open WordPress admin – Plugins and click “Activate” next to the plugin
- Activate & open plugin’s settings page located in the main WP admin menu as “Auy Autochat”.
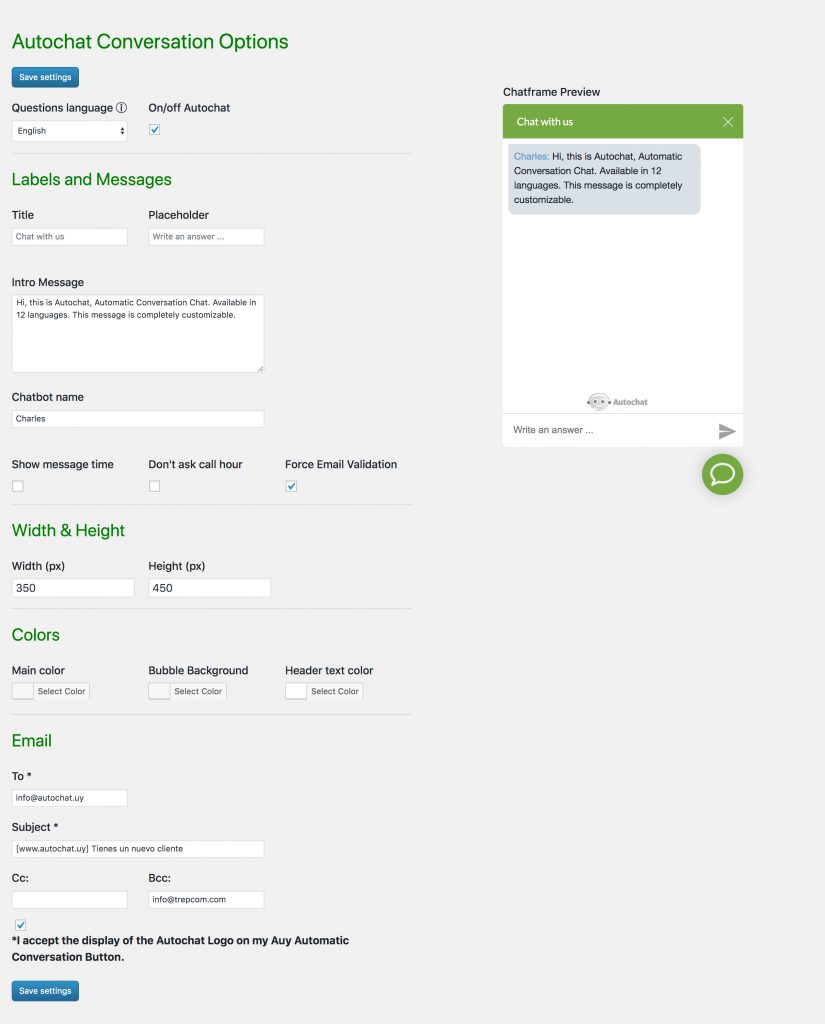
Options
Language: Determine the Autochat Language
On/off Autochat: Enable and disable the autochat in front page.
Labels and Messages:
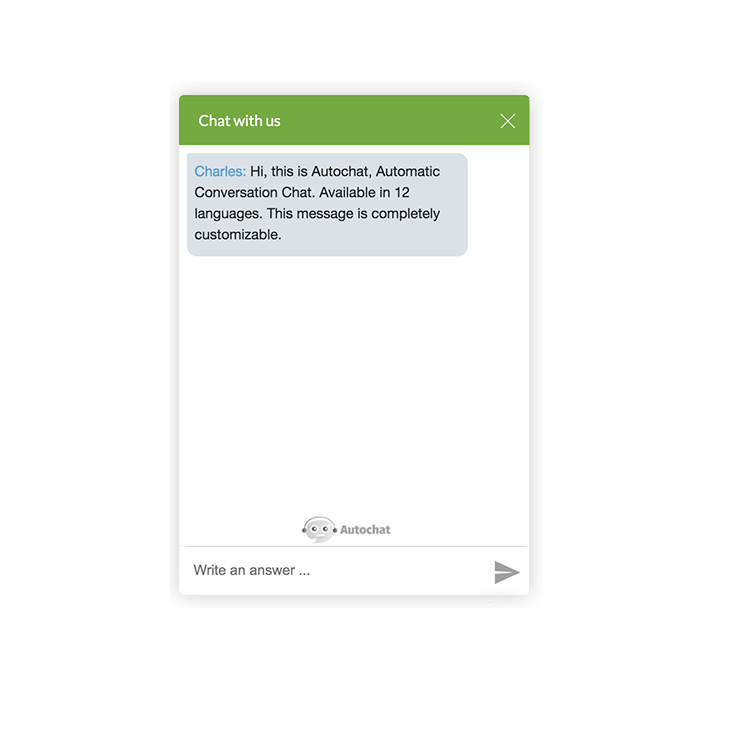
Title: Set the title in chat header.
Placeholder: Placeholder of the text input.
Intro Message: This is the first message or question.
Chatbot name: The name of the chatbot. If nothing is entered, no name will appear.
Show message time: Enable or disable time attached with messages.
Don’t ask call hour: Disable the option to request a call schedule if the user provides a phone number.
Force email validation: If active, force the lead to enter a valid email address.
Widget:
These fields are set to customize the appearance of the widget.
Width & Height: Set up the width and height of the chat window.
Main color: Set up the background color of the chat window header.
Bubble color: Set up the background color of the bubble button.
Header text color: Set up the header text color of the chat window.
Email:
These fields are set to configure email messages.
Fields To and Subject are mandatory to complete.
Live demo